October 30, 2008

Castle birthday cake

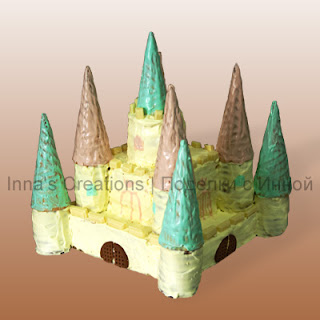
Castle cake

Another idea for decorating a birthday cake. Unfortunately, the only photo I have is old and bad. I tried to fix it in Photoshop and this is what I could achieve given my Photoshop skills.

The bottom part is a big square with a smaller square on top of it. There is a big tower on top of that. All these parts are cut out of sponge cakes. Stack round cookies sandwiched with vanilla cream for the four towers at the corners. Ice-cream cones make perfect roofs. Decorate the cake with pieces of white chocolate and cookies. The castle cake is very high, so make sure you have enough space in the fridge :)

October 26, 2008

Make a papier-mache cow using an empty water bottle and toilet paper rolls

Paper-mache cow

Finally we've finished this papier-mache cow project. It took us looooong two months, because either the parents — us — didn't have time for it, or the kids wasn't in the right mood. Anyway, I like the idea of using plastic bottles for paper-mache, which I learned from (again) the blog of Tatyana Dubinsky. We already used it for our paper-mache airplane, and now it's a cow. Our cow is a "classical style", black and white one. I asked my kids if they would like a brightly coloured or a "real" cow. They've chosen the "real" option. I think in their age they don't care about fanciness :) So, if you're still interested...

October 17, 2008

Almost 100: crawling baby quilled

Crawling baby. Quilling

There are almost 100 posts in my blog, and I thought it's time for it to have its own "face". 5 pages of sketches, about 80 photos and a couple of Photoshop files — and here you go. It's far from perfect, but unfortunately I don't know how to get exactly what I wanted :( Making the quilled part of the header — the crawling baby — turned out to be the easiest task. I made a pencil sketch, rolled the elements, glued them together and secured them in place until the glue is dry. I put an old mouse pad underneath to stick the pins into. I had also to put a piece of cardboard under the baby's arm to support it.

We also finished a cute paper-mache toy. I'll show it in a next post in a few days, along with the instructions :)

October 9, 2008

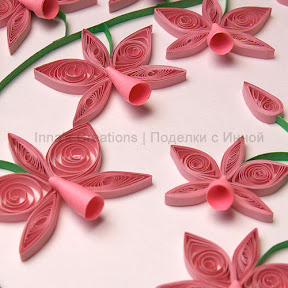
Simple orchid flowers. Framed quill art

Orchid (closeup). Quilling

I got a blossoming orchid as a gift and tried to make it's quilled copy. It's framed into a discarded sweets box, so I could've added "recycling" to the list of labels as well :)

Orchid. Paper quilling

October 4, 2008

Make toy turtles out of bottle caps

Turtles out of bottle caps

How to make toy turtles out of bottle caps: take a plastic bottle cap and a sheet of construction paper. Put the cap onto the paper and trace it around. That will be the turtle's body. Add a head, paws and tail. Cut them out, then just glue the cap onto the body. That's it. Try also making a few turtles of different sizes and stacking them on top of each other.

Turtle body pattern

October 3, 2008

Red-haired fairy: 3D quilled doll

Red haired fairy (closeup). 3D quilling

I keep exploring three-dimensional quilling, as you can see. When making this red haired fairy I tried to make it differently from many other quilled fairies (like in Three-Dimensional Quilling: Making Characters). First, her wings are shorter. I paid a price, though. Short wings do not support her, so I had to glue her onto a matchbox to keep her upright.

I also made her a magic wand out of a paper rectangle and a bead. Folded a tiny rose and put it into the fairy's hair. For the face I cut out paper eyelashes and mouth, and painted the eyes using felt-tip pens.

That's it. She is about 8 cm high, by the way.

Red haired fairy. 3D quilling

My first three-dimensional quilling: Lady in blue.